
系统环境centos 8.5,旨在搭建zammad工单平台后续使用。
全文参考:在 Rocky 8 上安装 Zammad 票务系统 | CentOS 8
更新系统软件包及依赖包。建议此步完成后可先做快照,后续如有搭建问题时可回滚到最初状态
[root@localhost ~]# sudo rm -f /etc/yum.repos.d/*.repo
[root@localhost ~]# sudo curl -o /etc/yum.repos.d/CentOS-Base.repo https://mirrors.aliyun.com/repo/Centos-vault-8.5.2111.repo
[root@localhost ~]# sudo dnf update -y
[root@localhost ~]# sudo dnf install -y epel-release
[root@localhost ~]# sudo dnf install -y curl wget gnupg2
安装Elasticsearch
将 elasticsearch GPG 密钥导入到您的系统存储中。
[root@localhost ~]#sudo rpm --import https://artifacts.elastic.co/GPG-KEY-elasticsearch
将 Elasticsearch 存储库添加到系统中。
[root@localhost ~]#sudo tee /etc/yum.repos.d/elasticsearch-7.x.repo<<EOF

[elasticsearch-7.x]
name=Elasticsearch repository for 7.x packages
baseurl=https://artifacts.elastic.co/packages/7.x/yum
gpgcheck=1
gpgkey=https://artifacts.elastic.co/GPG-KEY-elasticsearch
enabled=1
autorefresh=1
type=rpm-md
EOF
写入后回车如下图所示: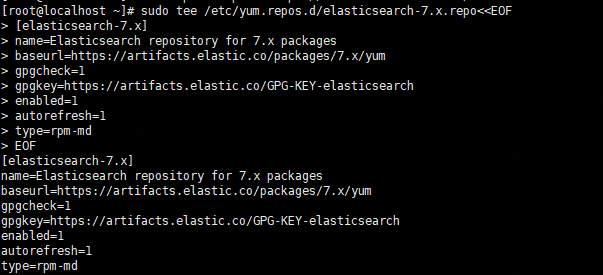
通过在终端中执行以下命令来安装 elasticsearch 包。
[root@localhost ~]#sudo dnf -y install elasticsearch
打开配置文件进行编辑
[root@localhost ~]#sudo vim /etc/elasticsearch/elasticsearch.yml
自定义 http.max_content_length 和 indices.query.bool.max_clause_count 值。
Tickets above this size (articles + attachments + metadata)
may fail to be properly indexed (Default: 100mb).
When Zammad sends tickets to Elasticsearch for indexing,
it bundles together all the data on each individual ticket
and issues a single HTTP request for it.
Payloads exceeding this threshold will be truncated.
Performance may suffer if it is set too high.
http.max_content_length: 400mb

Allows the engine to generate larger (more complex) search queries.
Elasticsearch will raise an error or deprecation notice if this value is too low,
but setting it too high can overload system resources (Default: 1024).
Available in version 6.6+ only.
indices.query.bool.max_clause_count: 2000
加入位置如图所示: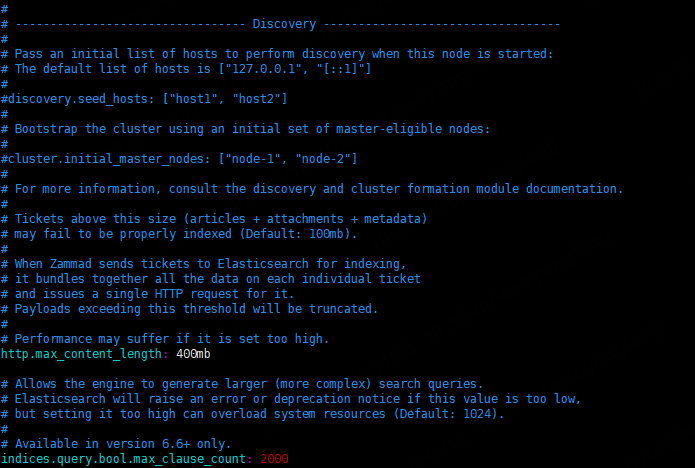
[root@localhost ~]#sudo systemctl enable --now elasticsearch
为elasticsearch安装ingest-attachment插件。
[root@localhost ~]#sudo /usr/share/elasticsearch/bin/elasticsearch-plugin install ingest-attachment
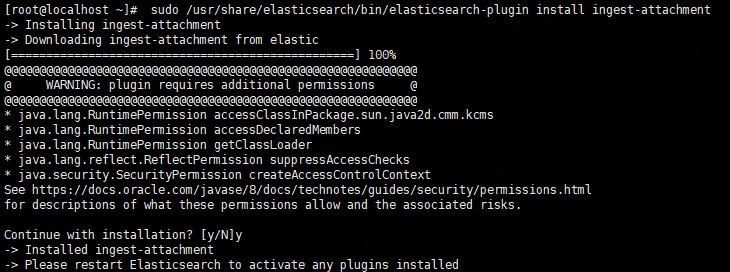
更改后重新启动服务。
[root@localhost ~]#sudo systemctl restart elasticsearch
CentOS 8 上安装 Zammad
导入 Zammad 存储库密钥
[root@localhost ~]#sudo rpm --import https://dl.packager.io/srv/zammad/zammad/key
然后添加 Zammad RPM 存储库,其中包含所需的软件包
[root@localhost ~]#wget https://dl.packager.io/srv/zammad/zammad/stable/installer/el/8.repo -O zammad.repo
[root@localhost ~]#sudo mv zammad.repo /etc/yum.repos.d/
使用 yum 或 dnf 包管理器安装 Zammad。
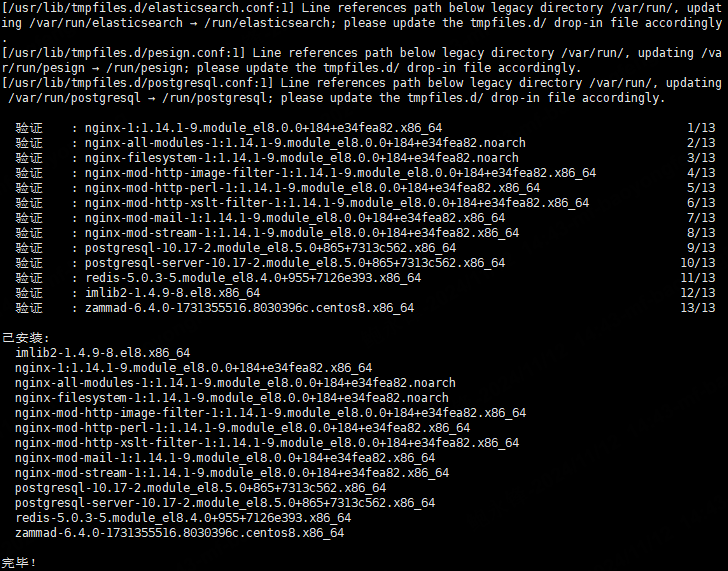
[root@localhost ~]#sudo dnf -y install zammad
启动并启用服务。
[root@localhost ~]#sudo systemctl enable --now zammad zammad-web zammad-worker zammad-websocket
设置数据的目录权限
[root@localhost ~]#sudo chmod -R 755 /opt/zammad/public/
如果 SELinux 处于强制模式,请配置标签。执行此条时将产生大量的配置文件提示更换,请不用在意,
[root@localhost ~]#sudo chcon -Rv --type=httpd_sys_content_t /opt/zammad/public/
[root@localhost ~]#sudo setsebool httpd_can_network_connect on -P
[root@localhost ~]#sudo semanage fcontext -a -t httpd_sys_content_t /opt/zammad/public/
[root@localhost ~]#sudo restorecon -Rv /opt/zammad/public/
[root@localhost ~]#sudo chmod -R a+r /opt/zammad/public/
打开防火墙上的端口 80 或端口 443(如果处于活动状态)。
[root@localhost ~]#sudo firewall-cmd --zone=public --add-service=http --permanent
[root@localhost ~]#sudo firewall-cmd --zone=public --add-service=https --permanent
[root@localhost ~]#sudo firewall-cmd --reload
[root@localhost ~]#systemctl status zammad zammad-web zammad-worker zammad-websocket
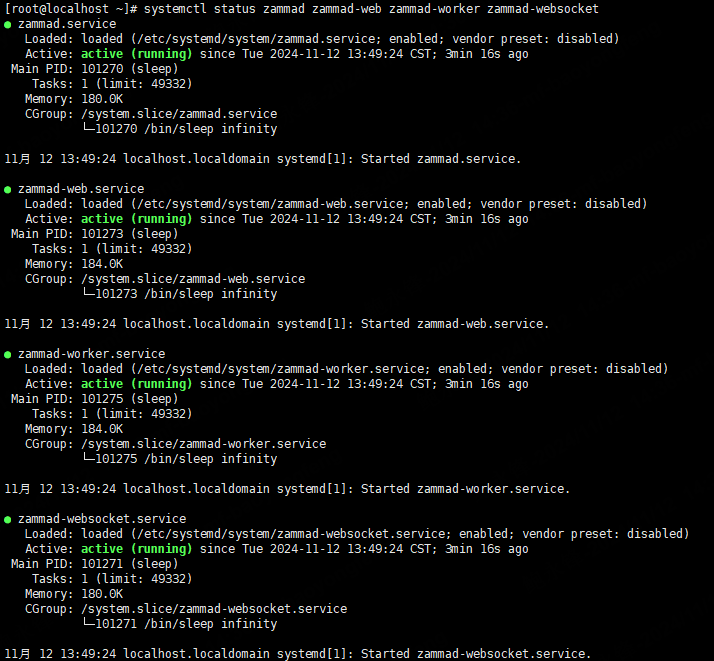 sr/uploads/2024/11/392746303.png
使用 zammad 命令设置 Elasticsearch 服务器地址。
[root@localhost ~]#zammad run rails r "Setting.set('es_url', 'http://localhost:9200')"
使用 Zammad 之前构建搜索索引。
[root@localhost ~]#zammad run rake zammad:searchindex:rebuild
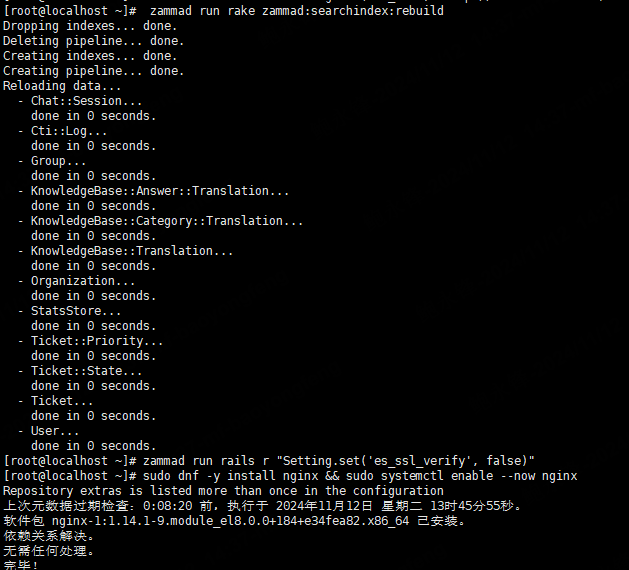
可以通过将 es_ssl_verify 设置为 false 来停用 SSL 验证。
[root@localhost ~]#zammad run rails r "Setting.set('es_ssl_verify', false)"
确保已安装 nginx。
[root@localhost ~]#sudo dnf -y install nginx && sudo systemctl enable --now nginx
[root@localhost ~]#sudo find / -name zammad.conf

[root@localhost ~]#sudo vim /etc/nginx/conf.d/zammad.conf
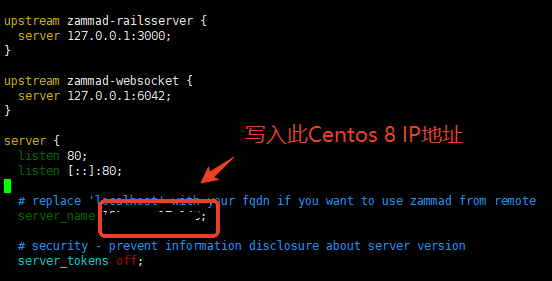
确认 Nginx 索引。
[root@localhost ~]#sudo nginx -t

重新启动 nginx Web 服务器服务。
[root@localhost ~]#sudo systemctl restart nginx
上述步骤完成后可在浏览器界面中输入http://centos_IP,进行剩下的配置。
本文由 yorickbao 创作,采用 知识共享署名4.0 国际许可协议进行许可。
本站文章除注明转载/出处外,均为本站原创或翻译,转载前请务必署名。